


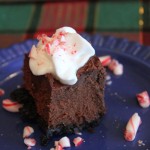
I’m not kidding. Everyone loved these Chocolate Peppermint Cheese Cake Squares! They’re so rich that one serving is only about 1 inch square. Each morsel is full of rich chocolate flavor…and the mint makes it extra special! No one feels bad about the calories because each piece is tiny…and after a big meal, who needs more than that?
I must give credit where credit is due. Sometime during December I saw a Facebook post that caught my eye, and resolved to make the recipe. Before you read any further, run right over to Liv Life and read her post about Chocolate Peppermint Cheesecake Bars. It was her photo and recipe that caused me to become obsessed with the idea of these tiny bites of fudgy perfection.
Of course, I never make a recipe exactly the way it’s written. Sigh. There’s usually some reason. Either I don’t have the ingredients exactly as called for in the recipe, or I decide to just try something different. In this case, I used different cookies for the crust and decided not to add the glaze. Otherwise, the recipes are very much the same. So here’s the recipe for the Chocolate Peppermint Cheese Cake Squares that I made, inspired by Kim at Liv Life and adapted from her recipe.
Chocolate Peppermint Cheesecake Squares
Ingredients
- Crust:
- 1 package of 30 Oreo cookies with green mint-flavored filling
- 5 Tbsp. melted unsalted butter
- Cheesecake:
- 8 oz. unsweetened chocolate chopped
- 8 oz. semisweet chocolate chopped
- 16 oz. softened cream cheese okay to use lower fat
- 1 1/3 cups granulated sugar
- 1 cup sour cream okay to use low fat
- 4 large eggs at room temperature
- Topping:
- Whipped cream I used the kind in a can
- crushed candy canes I use the mini's
Instructions
- Preheat oven to 350 degrees.
- Place the cookies in a food processor and process until they are crumbs. The creme filling may cause the crumbs to clump together. While the processor is still running, drizzle the melted butter into the crumbs and process until they are combined. Press the mixture evenly into a foil-lined 9" x 13" pan.
- Melt the chopped chocolate together in a double boiler, stirring occasionally until all the pieces are melted and smooth. When it's completely smooth, remove the bowl from the heat and let the chocolate cool at room temperature.
- Place the cream cheese and sugar in a large bowl and beat until smooth. Add the sour cream to the mixture, mixing and scraping down the sides of the bowl. Add the eggs, one at a time and stir into the mixture. Pour in the melted chocolate and mix until the batter is smooth.
- Pour the batter over the crust to cover evenly. Bake 25-30 minutes. Remove from oven and cool. Refrigerate the cake for at least 8 hours.
- To serve, cut a long strip of the cheese cake, remove from pan and then slice into 1 inch squares. Top with a little whipped cream and add some crushed candy cane bits to the top.
- This cheesecake will last for a week or two in the refrigerator if you wrap it well.
These decadent squares of fudgy deliciousness would have disappeared in a hurry if I hadn’t added the dreaded “Do Not Eat” note to the pan!
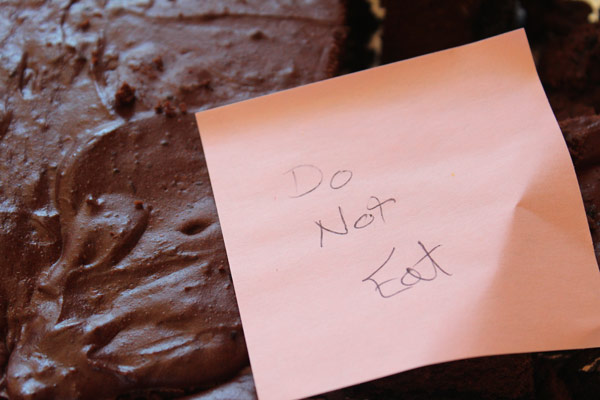
This delicious cheese cake would have disappeared in a hurry if I hadn’t put a “Do Not Eat” post-it on!
Thankfully I was able to serve them for Christmas Day, again a few days later when we had guests for dinner, and they even lasted until New Year’s! This one batch kept nicely in the refrigerator…and I think the flavor became even richer!

These cheesecake squares taste like peppermint fudge!
I will definitely add this recipe to my annual “Best Holiday Desserts” list! Thanks again to Kim at Liv Life for this fabulous idea!
One Comment
Leave a reply →